- Cauliflower
- Broccoli
- Celery
- Carrot
- Lettuce
- Onions I picked this plants because i think it's not hard to make it grow because a really don't know how to make a garden. Mr.Mitchell tell us that we are going to pick some rotten fruits and we are going to put it on the compost fit because it can help to make the soil become healthier for the vegetable that we were going to plant on the compost fit.
Wednesday, March 13, 2019
Community Impact Project
Today for our community impact project our teacher told us that we need to pick six plants that we want to plant to make a garden and the other students is helping Ms.Allan Fletcher to make a plum jam, they told us that we need to pick the plants that can grow this time of the year. We do some research to know what the best vegetable that can grow this time of the year.Our teacher told us that we need to pick only vegetable and were not allowed to pick a fruits. The vegetable that we picked are going to plant at the place that we clean last week and we also do a compost fit to make the soil healthy for the plants that we are going to plant there. I think the purpose why we decided to make a garden is to make our school become more beautiful and we know that vegetable is good to our health so maybe our teacher want to make us become more healthier and because before we go to the place there are so many rubbish that we see so our teacher told us that we need to clean that area and we are gonna make a garden there so we clean that area almost every Wednesday. The vegetable that i picked is:

Saturday, March 9, 2019
Crazy Crystals
Crazy crystals
Aim:To learn about a saturated solution and how to make
Crystals.
Borax Crystals

Materials:
- Container
- Spoon
- Paper
- Pen
- Borax
- Pipes
- Peg
Procedure:
Step 1: Grab a container
Step 2: Put 3 tablespoon of borax on the container
Step 3: Add the warm water on the borax
Step 4: Mix it well
Step 5: Grab 3 pipes and form it to a star
Step 6: Put the star pipe on the borax with warm water
Sugar Crystals

Ratio: 1 cup sugar to 1/2 cup water
Materials
1) Sugar
2) Container
3) Peg
4) Water
5) Spoon
6)Pipe
Process
Step 1: Grab a container
Step 2: Put the sugar on the container.
Step 3: Add the warm water to the container with sugar
Step 4: Mix the two ingredients together very well.
Step 5: Grab a one pipe
Step 6: Grab a peg and put it together with a pipe and put it on the container with warm water and sugar inside.
Step 7: After you do all the step wait for a day and observe what will happen to your experiment.
Salt Crystals
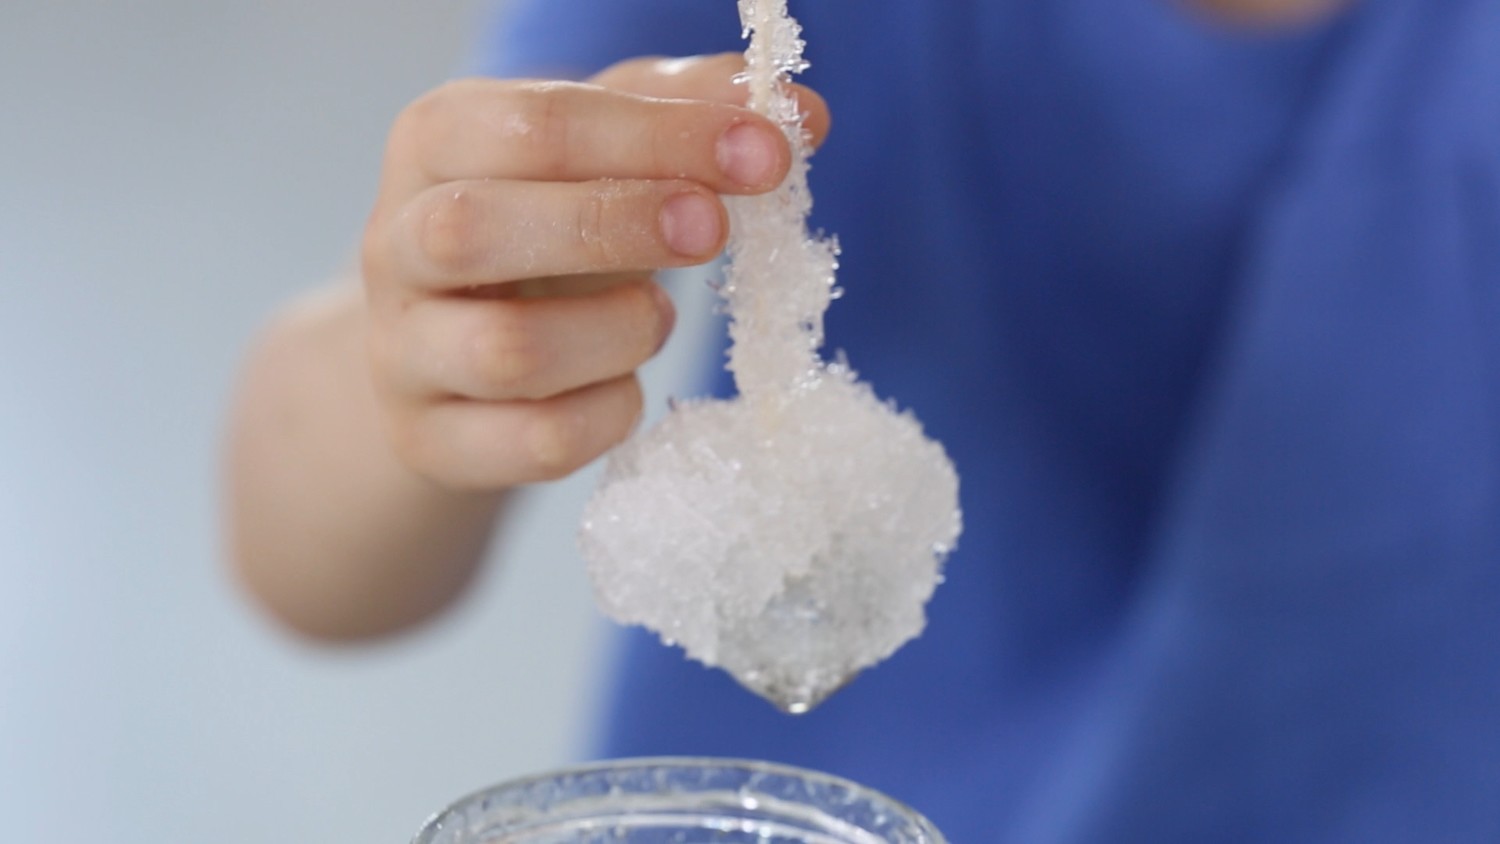
Ratio: 4 Tablespoons salt to 1/2 cup water
Materials
1) Salt
2) Container
3) Peg
4) Water
5) Spoon
6)pipe
Process:
Step 1: Grab a container/cup
Step 2: Place 3 tablespoons of sugar into the container/cup
Step 3: Pour half a cup of warm water into the cup or container
Step 4: Mix the salt and water with a spoon for how long it takes just to get the salt to dissolve
Step 5: Then after the water and salt has dissolved go and grab a pipe and peg.
Step 6 : When you have your pipe and your peg clip the pipe into the peg and put it into the top of the container and push it until it touches the water and the salt.
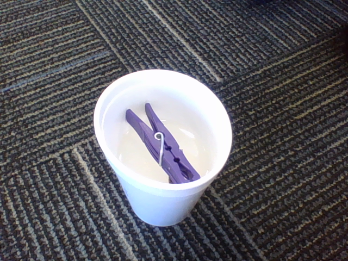
Findings:
Describe your crystals in the table below.
For our science experiment our teacher said that we will do a crystals using a sugar.salt and a borax when the teacher said that i become confused because i thought it’s impossible, when we started our experiment we need to wait one day to see the result and after one day we saw that our experiment is successful but the sugar and salt crystals is like nothing happen because the pipe that we put there is just wet and the sugar and salt is stayed on the water but we enjoy the experiment because we have a new experiment that we learn about science and because of that i become more interested about science.
10 Mystery ingredients.
AIM: TO LEARN THE NAMES OF 10 HOUSEHOLD CHEMICALS, THEIR ELEMENTS, AND REACTIONS WITH OTHER SUBSTANCES.
Equipments:
- Dishwashing detergent
- Lemon
- Salt
- Vinegar
- Sugar
- Air Freshener
- Onion
- Lemonade
- Bleach
- Baking soda
Task 1:Putt the chemicals in a chart with the titles-name,chemicals,ingredients,image,solid,liquid,gas.
Name
|
Chemical
|
Image
|
solid/liquid/gas
|
Dishwashing detergent
|
Chlorine
|  |
liquid
|
Lemon
|
Citric acid
|  |
solid
|
salt
|
Sodium chloride
|  |
solid
|
vinegar
|
Acetic acid
|  |
liquid
|
sugar
|
Disaccharide
|  |
solid
|
Air freshener
|
Formaldehyde
|  |
gas
|
onion
|
Folic acid
|  |
solid
|
lemonade
|
Malic acid
|  |
liquid
|
bleach
|
chlorine
|  |
liquid
|
Baking soda
|
Sodium bicarbonate
|  |
solid
|
Also the exciting part is when Mr Palmer show a experiment.
Materials:
Baking soda
Vinegar
balloon
a empty bottle
Put 12 to 1 ratio of vinegar and carefully put it in the container where the baking soda is meant to be placed in.
Reaction:
When you adding the vinegar to baking soda it gives you an immediate reaction. Adding them together the reactions is delayed but then the reaction will fizzes the amount. If you put more vinegar is better but if you don’t put a lot it will not that kinda bit work, a 12 to 1 ratio of vinegar to baking soda it will cause a overload bubbled and fizzed reaction.
Wednesday, March 6, 2019
Today for our community impact project first we pick some plums and our teacher said that the plums that we will pick is going to make a jam and we will sell to the other teachers in hornby high school and the money that we will receive is going to buy the other tools that we need to use for the other project that we need to do on our Community Impact Project. After picking some plums we head to the one part of our school that we need to clean our teachers told us that we need to clean that area because we are going to plant some vegetable to that area so my class and the other class is started to clean the area,we pick some rubbish and put it on the garbage bag and the leaves is we put on the compost fit for the vegetable that we will plant on it.All of this is we do for one day because we want that our school is become more beautiful and become clean and i am so happy that i can help to make our expectation is became true. Here are some pictures the time that we will cleaning the area.

Tuesday, February 26, 2019
Chromatography
Aim to separate colours by using the process of chromatography.
Definition: A technique for separating the different parts of a mixture / solid using liquid.
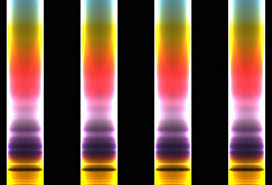
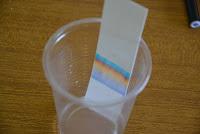

Rainbow paper
Materials;
1. Filter paper
2. Cup
3. Water
4. Ruler
5.Color pens (red,green,and black)
6. pencil
Process:
Step 1:You need to measure the filter paper and put the line using a pencil.
Step 2:After you measure the filter paper fold the top of the filter paper.
Step 3:After you folded the filter paper you need to put the dots in the bottom you need a black,red and green color pens.
Step 4:After you put the dots using the color pens you need to put the filter paper on the top of the cup.
Step 5:Next step is you need to put a little amount of water inside the cup.
Step 6:After all the steps you can now observe what happened on your experiment and how it happend.
Findings: Write about what happened.
After we put the water inside the cup the dots and going up and the dots change the colors.Also the dots is not a one color if the dots is going up the color is also change.
Reflection: What have I learnt from this experiment?
At first i surprised what and how it happened but i find out how it happened so know i know what is the different colors inside the colors the we use on this experiment.After this experiment now i have a new lesson that i learn in science.

Chromatography
Skittles
Aim: To separate colours by using the process of chromatography.


Materials;
1. Skittles
2. Petri Dish
3. Water/Liquid
Process:
Step 1: Get a petri dish a place it infront of your group
Step 2: Put the skittles around the petri dish inside and wait for the next step.
Step 3: After places all you skittles in you have to add warm water to just nearly over under the top of the skittles.
Step 4: Wait… it will take a few seconds or minutes for all the beautiful colours flow to the middle.
Step 5: Observe and record, it is optional but you can record while you observe it.
Step 6: Photo and Share, This is also optional but it will be nice if you can take photo of it and share it on social media or a blog.
Findings: Today we do a experiment in science the experiment is about the skittles at first i am confused because i don't know how to do a experiment using skittles and i get more confused when our teacher said to us that we need to pour some water on the skittles when my group do what the teacher said it's like nothing happen so we wait for a while and finally there are something happen i was shock because it's beautiful the color on the skittles faded and the colors mix on the water after the beautiful experiment i was so happy because finally i learn a new experiment on our science,and i enjoy that.
Dirty Water Filtration Experiment
Dirty Water Filtration
Aim: To make a filtration plant using household materials.
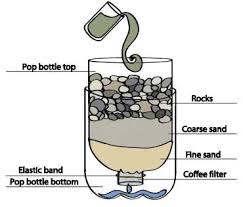 |
Water Filtration Plant
|
What is filtration?
Filtration is any various mechanical,physical or biological operation that separate solids from fluids(liquid or gases) by adding a medium through which only the fluids can pass. The fluid that passes through is called the flirtrate.
Examples are:
- Brewing Coffee
- Kidney
- Separating dirty from water (Dirty water and a cloth)
- H.E.P.A (High-Efficiency Particulate Air) Filter (Air conditioner) and vacuum
Materials
1.Plastic bottle
2.Filter Paper
3.Sand
4.Pebbles
5.Scissors
6.Water
Process - ( use verbs or doing words in each step )
Step 1
Cut the bottle in half using scissors
Step 2
After cutting put the top half upside down
STEP 3
Put the filter paper with sand inside the bottle(you need to fold it before you put the sand inside)
STEP 4
Add the pebbles on the top of the sand and filter paper
STEP 5
Put the dirty water slowly and observe what is the result of your experiment.
Measurements
Write a short sentence about the water every 1 minute.
Include 'How much water has filtered through', 'How fast it is dripping through', and
'How clear the water is'.
We got the water to drip! It’s not clear though however there wasn’t any dirt to it.
The experiment turned out well I wouldn’t say it was our best work.
I was the one who cut the bottle into half, Rieya did the folding of the filter paper,
Lhysette was in charge of getting the sand, Rieya was in charge of getting the pebbles,
Lhysette was also in charge of getting the dirty water
As I said you don’t really expect it to be clear as actual water so don’t get your expectation high.
What I feel:
My group and I are pretty happy with our work but it could’ve been much better if the water was
a little bit clear.
My next steps:
My next step is, placing the layers properly because the water wasn’t clear enough but it’s clean
Group members: Me, Lhysette, Rieya and Skyler

Subscribe to:
Posts (Atom)